This post will explore publishing a very simple Docker image to Docker Hub in a simple CI pipeline. I used a couple similar posts and documentation for reference while setting this up:
- Building your first Docker image with Jenkins 2: Guide for developers
- How To Build Docker Images Automatically With Jenkins Pipeline
- Using a Jenkinsfile
You can find my repository for this post here:
https://github.com/csuttles/dockerci
Overview
The CI pipeline built in this post is something like this:
- Our Dockerfile, application code and Jenkinsfile live in a git repository
- Jenkins polls this repository for changes, and runs the build if a new change has been pushed
- The build process starts on a local Jenkins master, which is also run in Docker, and grabs the Jenkinsfile when the repo is cloned locally
- The Jenkins master is configured to use AWS, and it spawns a Jenkins slave (if one is not already running) in in EC2 (a t1 micro); this instance is terminated after a specified timout.
- The AWS Jenkins slave clones the repository, builds the image and pushes to Docker Hub, tagging it with an incremental build number and also 'latest'
Configure Jenkins Master
I started out running my local Jenkins master by running the following command on one of my lab machines which is already running Docker:
docker run --name jenkins -d -p 8080:8080 -p 50000:50000 -v jenkins_home:/var/jenkins_home jenkins/jenkins:ltsI grabbed the administrator password from the logs, logged in and ran through the installation wizard. You can see more details and screenshots of that part in the blog posts mentioned earlier. I installed the recommended plugins, the 'Green Balls' plugin, and also the one that I will focus on in this post:
- Amazon EC2 Plugin
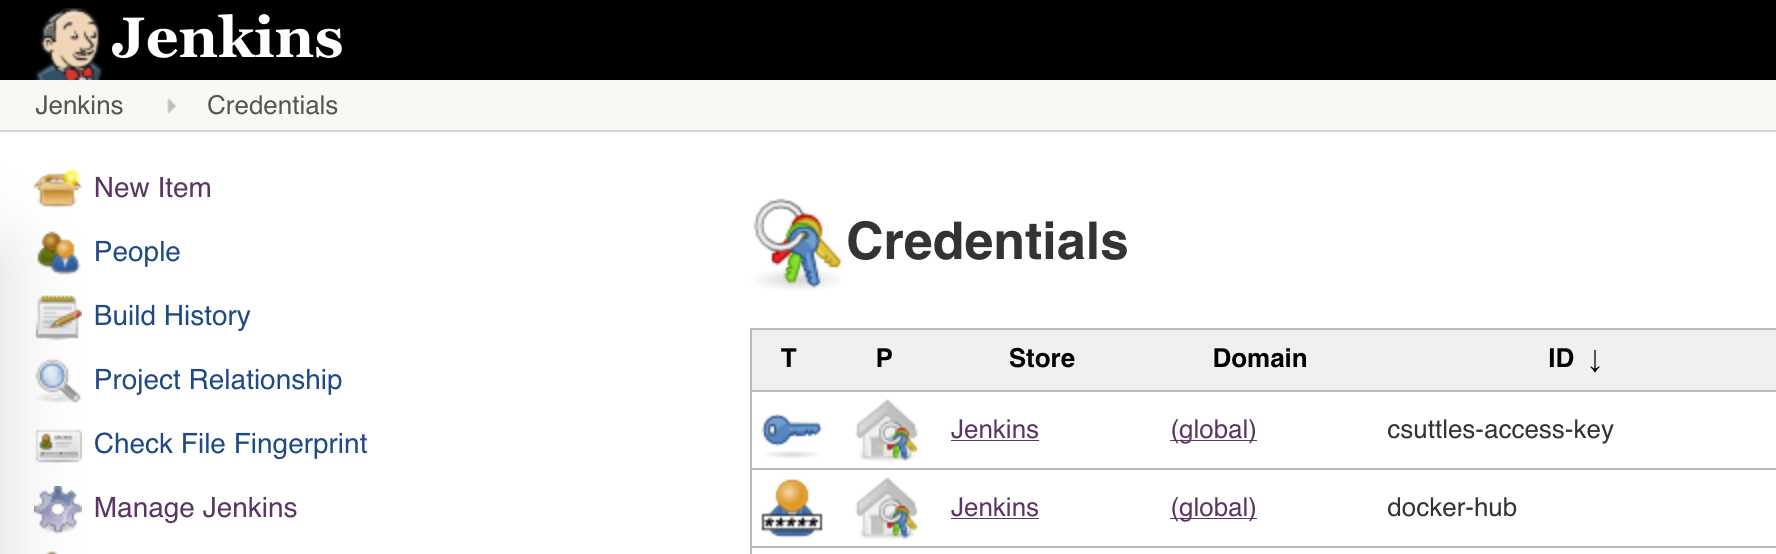
Before using this, you will need to configure credentials in for AWS in Jenkins, along with credentials for Docker Hub, which we will use later to push the image:
I used the us-west-2 region for this, so I used the following AMI and initscript when configuring the Amazon EC2 plugin:
- AMI:
ami-bf4193c7 - INIT:
sudo yum update -y
sudo yum install -y docker git java-1.8.0-openjdk
sudo service docker start
sudo usermod -a -G docker ec2-user
sudo alternatives --set java /usr/lib/jvm/jre-1.8.0-openjdk.x86_64/bin/java
The remainder of the configuration is pretty self explanatory and is also covered in more detail in the How To Build Docker Images Automatically With Jenkins Pipeline blog post. You start by adding a cloud of type "Amazon EC2", and configure credentials and other options. I mention the region, AMI and init script since I used Amazon Linux, and AMIs are region specific. I also found it useful to disable instance termination while troubleshooting, and I experienced errors with the plugin until I selected the Connect by SSH Process in advanced options. I also configured only a single executor to avoid spinning up too many instances in EC2.
Configuring the Build and Jenkinsfile
With AWS configured, I had to do the job configuration, and make some changes to the Jenkinsfile. The Jenkinsfile and app are heavily borrowed from Building your first Docker image with Jenkins 2: Guide for developers, with only slight changes to make the Jenkinsfile accomodate building in AWS. There's a lot of good details on the "Hello World" node app, the GUI parts of setting up the Jenkins job in that post as well, so I won't repeat it here. The Jenkins set up can also be automated; one way to do it can be found here. Instead of repeating stuff from my references, I'll focus on what is different.
At the time of pusblishing this post, the Jenkinsfile looks like this:
node {
def app
stage('Clone repository locally') {
/* Let's make sure we have the repository cloned to our workspace */
checkout scm
}
}
node('docker') {
stage('Clone repository on slave') {
/* Let's make sure we have the repository cloned to our workspace */
checkout scm
}
stage('Build image') {
/* This builds the actual image; synonymous to
* docker build on the command line */
app = docker.build("csuttles/hsl")
}
stage('Test image') {
/* Ideally, we would run a test framework against our image.
* For this example, we're using a Volkswagen-type approach ;-) */
app.inside {
sh 'echo "Tests passed"'
}
}
stage('Push image') {
/* Finally, we'll push the image with two tags:
* First, the incremental build number from Jenkins
* Second, the 'latest' tag.
* Pushing multiple tags is cheap, as all the layers are reused. */
docker.withRegistry('https://registry.hub.docker.com', 'docker-hub') {
app.push("${env.BUILD_NUMBER}")
app.push("latest")
}
}
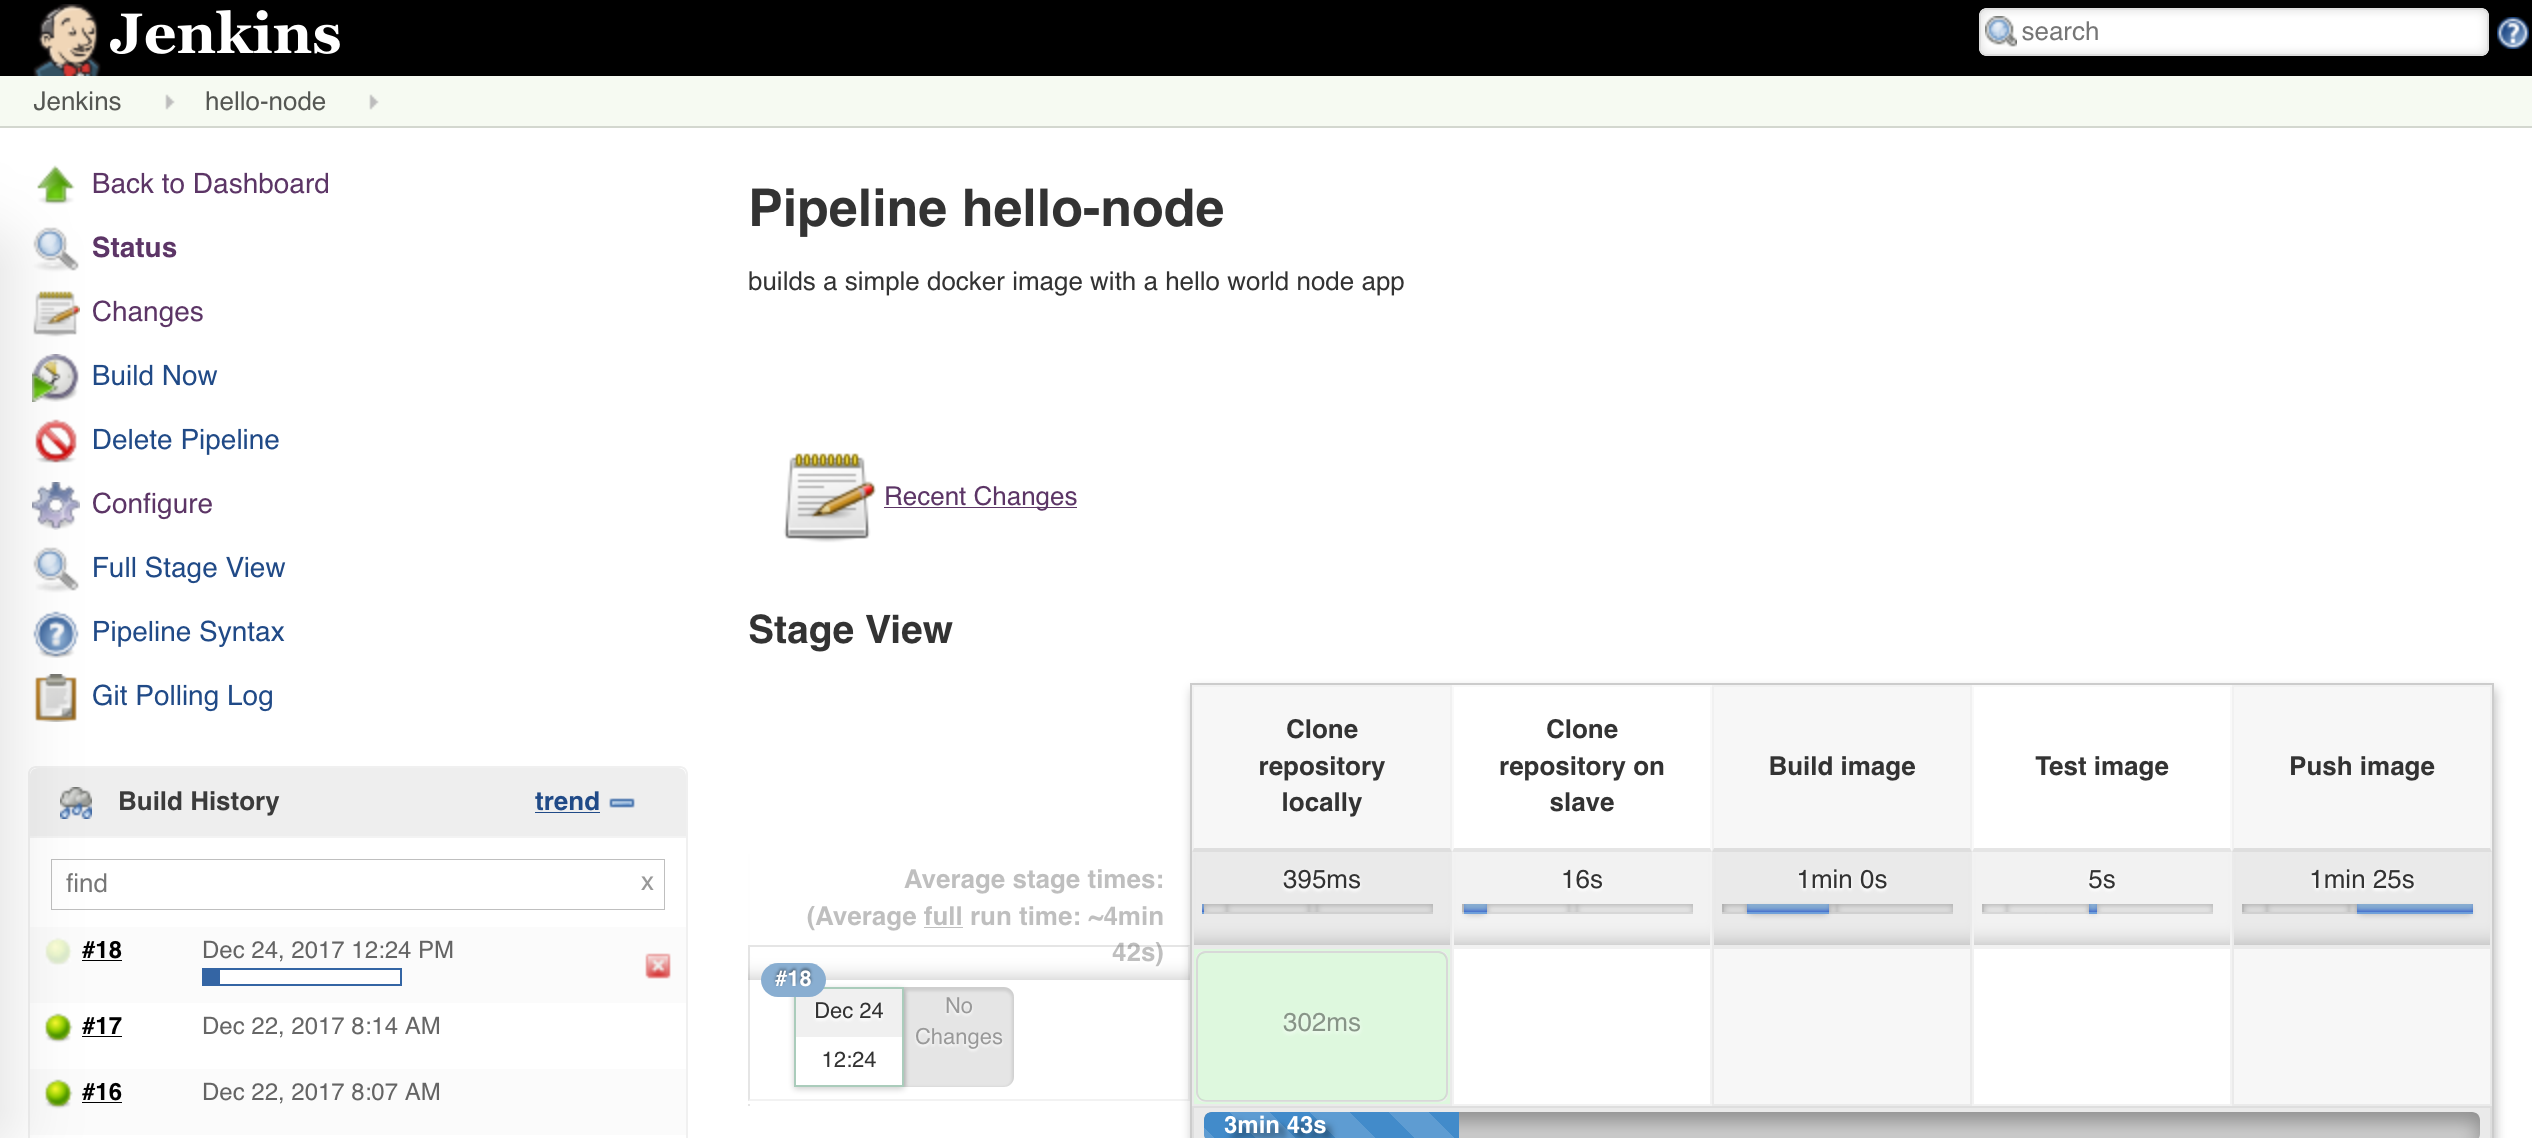
}You can find the current version in my github repository. Let's take a look at what is happening here.
The first stage corresponds with lines 1-9, or node() {}; it is run locally on the Jenkins master and checks out the repo to get the Jenkinsfile. It's a little wasteful to clone the whole repo, but this keeps the build instructions coupled with the app, and this repo is very small, so I let it be. If this were a real application or a larger example, it might be better to fetch the Jenkinsfile a different way.
The remaining stages happen on the Jenkins slave, node('docker') {}. Please see the Jenkins Pipeline docs for using multiple agents for more details. The slave is spawned at build time if the SCM polling in the job kicks off a build, and after it is bootstrapped by the init script, it executes the stages of the pipeline defined in this part of the Jenkinsfile. The crucial bit that ties this together is using the 'docker' tag in the Amazon EC2 plugin configuration in the main section. The tag used in that config does not have to be 'docker', but it must match the string passed to the node selector in the Jenkinsfile.
From here, the slave also clones the repository, which contains the Dockerfile and the application. It builds the docker image, does some simple tests, and pushes it to Docker Hub, using the credentials, Docker repository, and tag found in the Jenkinsfile. Again, it is important that the credentials string in the Jenkinsfile match the credentials configured on your Jenkins master. The image is tagged with both the build number from Jenkins, and the tag 'latest'.
Summary
I ended up with something like this at build time:
Here you can see my build host spawned in EC2:

There's a bit of delay as the Jenkins slave is spawned, but it gets terminated after 20 minutes of idle time and even when paying the on-demand price, t1 micros are cheap.
There are a few ways this could be changed, but it was a fun little home project. The build doesn't have to be done in EC2; I chose to do so to make things a little more interesting. You can also build locally, in another Docker container, or using a third party service. It's also possible to push the image to a private registry, instead of, or in addition to Docker Hub.
It's a simple CI that can be used as a starting point for more interesting projects, and it was a fun exercise.